Request/Reply
9 Minute Read
This tutorial outlines both roles in the request-response message exchange pattern. It will show you how to act as the client by creating a request, sending it and waiting for the response. It will also show you how to act as the server by receiving incoming requests, creating a reply and sending it back to the client. It builds on the basic concepts introduced in publish/subscribe tutorial.
Assumptions
This tutorial assumes the following:
- You are familiar with Solace core concepts.
- You have access to Solace messaging with the following configuration details:
- Connectivity information for a Solace message-VPN
- Enabled client username and password
- Enabled MQTT services
One simple way to get access to Solace messaging quickly is to create a messaging service in Solace Cloud as outlined here. You can find other ways to get access to Solace messaging below.
Goals
The goal of this tutorial is to understand the following:
- On the requestor side:
- How to create a request
- How to retrieve a unique Reply-To topic
- How to receive a response
- How to correlate the request and response
- On the replier side:
- How to detect a request expecting a reply
- How to generate a reply message
MQ Telemetry Transport (MQTT) Introduction
MQTT is a standard lightweight protocol for sending and receiving messages. As such, in addition to information provided on the Solace developer portal, you may also look at some external sources for more details about MQTT. The following are good places to start
Overview
MQTT does not explicitly support the request-response message exchange pattern. However, this tutorial will implement the pattern by defining a topic structure to send requests and by obtaining a unique Reply-To topic from the Solace message router on which the response should be sent back to the requestor. Obtaining the Reply-To topic from a MQTT session is a Solace extension to MQTT and is achieved by adding a topic subscription to the designated special topic “$SYS/client/reply-to”. You can learn more details on requesting MQTT session information by referring to the Solace Docs – Managing MQTT Messaging.
This tutorial will be using the MQTT Quality of Service (QoS) level 0 to send and receive request and response messages, but it is possible to use any of the QoS level 0, 1, or 2 for the request response scenarios.
Message Correlation
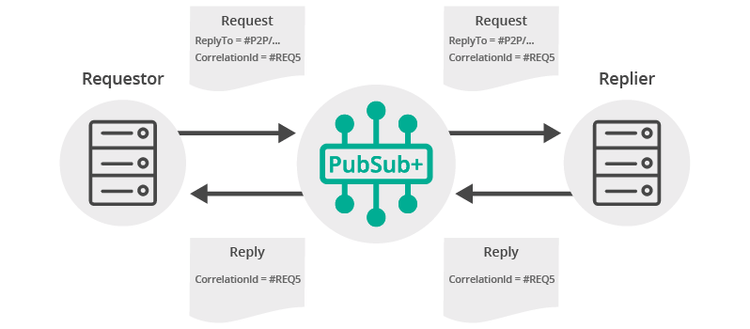
For request-response messaging to be successful it must be possible for the requestor to correlate the request with the subsequent response. In this tutorial two fields are added to the request message to enable request-reply correlation. The reply-to field can be used by the requestor to indicate a topic where the reply should be sent. A natural choice for this is to use a unique topic per client by requesting the Reply-To topic from Solace messaging, as described above in the Overview section.
The second requirement is to be able to detect the reply message from the stream of incoming messages. This is accomplished by adding a correlation-id field. Repliers can include the same correlation-id in a reply message to allow the requestor to detect the corresponding reply. The figure below outlines this exchange.
In this tutorial the payload of both the request and reply messages are formatted to JSON in order to add the reply-to field, the correlation-id field, and the message contents. You can use any payload format which both the requestor and replier understand, but for the purpose of this tutorial we choose JSON to structure the payload of the message and keep the tutorial simple. This tutorial will use the JSON-Simple Java library to both construct and parse the payload in JSON. The section below can be added to your pom.xml to configure the JSON-Simple dependency.
<project ...>
  ...
  <dependencies>
    <dependency>
     <groupId>com.googlecode.json-simple</groupId>
      <artifactId>json-simple</artifactId>
      <version>1.1.1</version>
    </dependency>
  </dependencies>
</project>
Get Solace Messaging
This tutorial requires access Solace PubSub+ messaging and requires that you know several connectivity properties about your Solace messaging. Specifically you need to know the following:
| Resources | Value | Description |
|---|---|---|
| Host | String | This is the address clients use when connecting to the PubSub+ messaging to send and receive messages. (Format: DNS_NAME:Port or IP:Port) |
| Message VPN | String | The PubSub+ message router Message VPN that this client should connect to. |
| Client Username | String | The client username. (See Notes below) |
| Client Password | String | The client password. (See Notes below) |
There are several ways you can get access to PubSub+ Messaging and find these required properties.
Option 1: Use PubSub+ Cloud
-
Follow these instructions to quickly spin up a cloud-based PubSub+ messaging service for your applications.
-
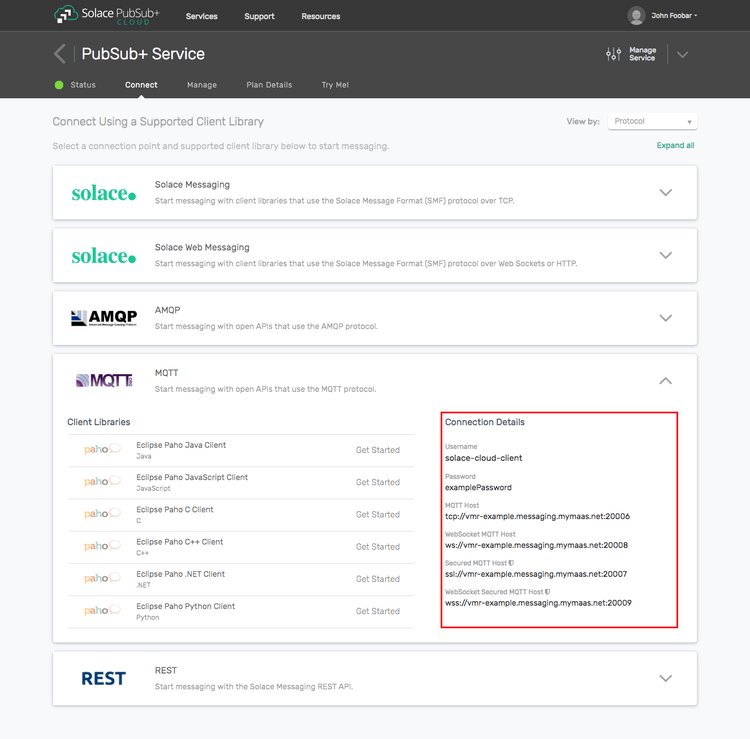
The messaging connectivity information is found in the service details in the connectivity tab (shown below). You will need:
- Host:Port (use the SMF URI)
- Message VPN
- Client Username
- Client Password

Option 2: Start a PubSub+ Software
-
Follow these instructions to start the PubSub+ Software in leading Clouds, Container Platforms or Hypervisors. The tutorials outline where to download and how to install the PubSub+ Software.
-
The messaging connectivity information are the following:
-
Host: <public_ip> (IP address assigned to the VMR in tutorial instructions)
-
Message VPN: default
-
Client Username: sampleUser (can be any value)
-
Client Password: samplePassword (can be any value)
Note: By default, the PubSub+ Software "default" message VPN has authentication disabled.
-
Option 3: Get access to a PubSub+ Appliance
-
Contact your PubSub+ appliance administrators and obtain the following:
- A PubSub+ Message-VPN where you can produce and consume direct and persistent messages
- The host name or IP address of the Solace appliance hosting your Message-VPN
- A username and password to access the Solace appliance
Obtaining an MQTT Client Library
Although, you can use any MQTT Client library of your choice to connect to Solace, this tutorial uses the Paho Java Client library. Here are a few easy ways to get the Paho API. The instructions in the Building section assume you're using Gradle and pulling the jars from maven central. If your environment differs then adjust the build instructions appropriately.
Get the API: Using Gradle
compile("org.eclipse.paho:org.eclipse.paho.client.mqttv3:1.1.0")Get the API: Using Maven
<dependency>
  <groupId>org.eclipse.paho</groupId>
  <artifactId>org.eclipse.paho.client.mqttv3</artifactId>
  <version>1.1.0</version>
</dependency>
Connecting a Session to Solace Messaging
This tutorial builds on the TopicPublisher introduced in Publish-Subscribe with MQTT. So connect the MqttClient as outlined in the Publish-Subscribe with MQTT tutorial.
Making a Request
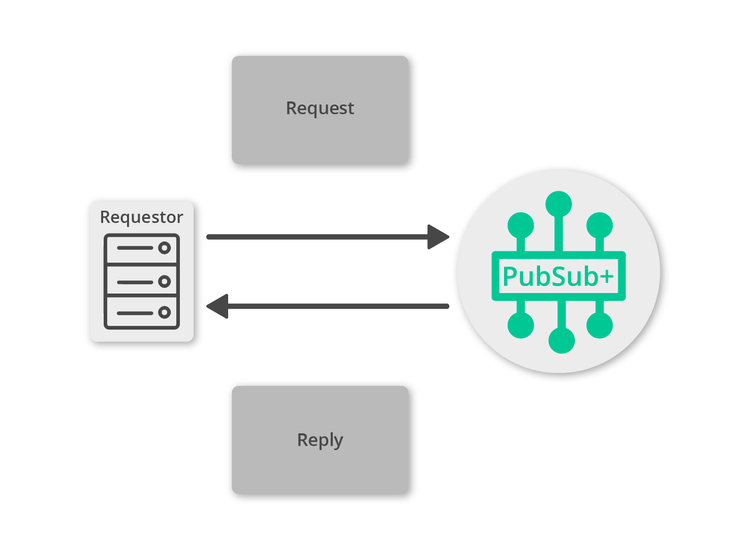
First let’s look at the requestor. This is the application that will send the initial request message and wait for the reply.
The requestor must obtain the unique reply-to topic. Using Solace Messaging, this can be accomplished by adding a subscription to the designated special topic “$SYS/client/reply-to”. The reply-to topic is received asynchronously through callbacks. These callbacks are defined in MQTT by the MqttCallback interface. The same callback is also used to receive the actual reply message. In order to distinguish between the two messages we inspect the topic string provided in the MqttCallback.messageArrived method.
mqttClient.setCallback(new MqttCallback() {
    public void messageArrived(String topic, MqttMessage message) throws Exception {
        // If the topic is "$SYS/client/reply-to" then set our replyToTopic
        // with the contents of the message payload received
        if (topic != null && topic.equals("$SYS/client/reply-to")) {
            replyToTopic = new String(message.getPayload());
        } else {
            try {
                // Received a response to our request
                Object obj = parser.parse(new String(message.getPayload()));
                JSONObject jsonPayload = (JSONObject) obj;
            } catch (ParseException ex) {
                System.out.println("Exception parsing response message!");
                ex.printStackTrace();
            }
        }

        latch.release(); // unblock main thread
    }

    public void connectionLost(Throwable cause) {
        System.out.println("Connection to Solace broker lost!" + cause.getMessage());
        latch.release();
    }

    public void deliveryComplete(IMqttDeliveryToken token) {
    }
});
Now the requestor can add the subscription to the special designated topic:
mqttClient.subscribe("$SYS/client/reply-to", 0);The requestor uses a semaphore to block the requestor thread until the reply-to message has been received. Once the reply-to message has been received, the topic is obtained from the payload of the message as shown above in the callback. You must then subscribe to the obtained reply-to topic in order to express interest in receiving responses. This tutorial uses a QoS level of 0 for at most once delivery for our response messages.
mqttClient.subscribe(replyToTopic, 0);At this point the requestor is ready to send request messages and receive responses.
// Create the request payload in JSON format
JSONObject obj = new JSONObject();
obj.put("correlationId", UUID.randomUUID().toString());
obj.put("replyTo", replyToTopic);
obj.put("message", "Sample Request");
String reqPayload = obj.toJSONString();

// Create a request message and set the request payload
MqttMessage reqMessage = new MqttMessage(reqPayload.getBytes());
reqMessage.setQos(0);

// Publish the request message
mqttClient.publish(requestTopic, reqMessage);
The requestor uses a semaphore to block the requestor thread until the response message has been received.
try {
    latch.acquire(); // block here until message received
} catch (InterruptedException e) {
    System.out.println("I was awoken while waiting");
}
Replying to a Request
Now it is time to receive the request and generate an appropriate reply.
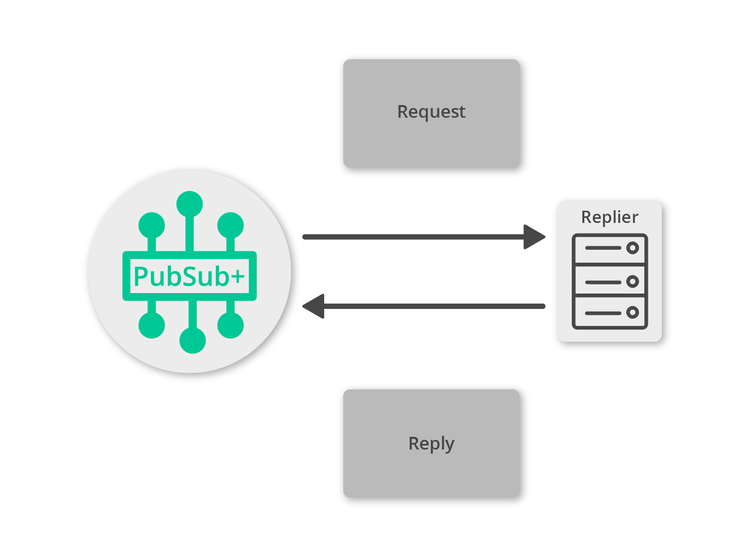
Similar to the requestor, an MqttClient is created and connected to Solace messaging. Request messages are received asynchronously through callback defined by the MqttCallback interface. When a request message is received, the replier parses the payload of the message to a JSON object, constructs a reply message and adds the correlation-id field retrieved from the request payload. The reply message is published to the reply-to topic found in the body of the request message.
mqttClient.setCallback(new MqttCallback() {

    public void messageArrived(String topic, MqttMessage message) throws Exception {
        try {
            // Parse the received JSON request message
            Object payloadObj = parser.parse(new String(message.getPayload()));
            JSONObject jsonPayload = (JSONObject) payloadObj;

            String correlationId = (String) jsonPayload.get("correlationId");
            String replyTo = (String) jsonPayload.get("replyTo");
            String messageContent = (String) jsonPayload.get("message");

            // Create the response payload in JSON format
            JSONObject obj = new JSONObject();
            obj.put("correlationId", correlationId);
            obj.put("message", "Sample Response");
            String respPayload = obj.toJSONString();

            // Create a response message and set the response payload
            MqttMessage respMessage = new MqttMessage(respPayload.getBytes());
            respMessage.setQos(0);

            // Publish the response message using the MqttTopic class
            MqttTopic mqttTopic = mqttClient.getTopic(replyTo);
            mqttTopic.publish(respMessage);

            latch.countDown(); // unblock main thread
        } catch (ParseException ex) {
            System.out.println("Exception parsing request message!");
            ex.printStackTrace();
        }
    }

    public void connectionLost(Throwable cause) {
        System.out.println("Connection to Solace broker lost!" + cause.getMessage());
        latch.countDown();
    }

    public void deliveryComplete(IMqttDeliveryToken token) {
    }

});
Now the replier can add the topic subscription with a QoS level of 0, to express interest in receiving request messages.
mqttClient.subscribe(requestTopic, 0);Then after the subscription is added, the replier is started. At this point the replier is ready to receive messages and send responses to your waiting requestor.
Summarizing
The full source code for this example is available on GitHub. If you combine the example source code shown above results in the following source:
Getting the Source
Clone the GitHub repository containing the Solace samples.
git clone https://github.com/SolaceSamples/solace-samples-mqtt
cd solace-samples-mqtt
Building
The project uses Gradle. To build, execute the following command.
./gradlew buildThis builds all of the Java Samples with OS specific launch scripts. The files are staged in the build/staged directory.
Sample Output
If you start the basicReplier with arguments specifying your Solace messaging connection details, it will connect and wait for a message. Replace HOST with the host address of your Solace VMR.
$ ./build/staged/bin/basicReplier <host:port> <client-username> <client-password>
BasicReplier initializing...
Connecting to Solace messaging at <host:port>
Connected
Subscribing client to request topic: T/GettingStarted/request
Waiting for request message...
Then you can send a request message using the basicRequestor with the same arguments. If successful, the output for the requestor will look like the following:
$ ./build/staged/bin/basicRequestor <host:port> <client-username> <client-password>
BasicRequestor initializing...
Connecting to Solace messaging at <host:port>
Connected
Requesting Reply-To topic from Solace...

Received Reply-to topic from Solace for the MQTT client:
    Reply-To: _P2P/v:solace-vmr/_mqtt/HelloWorldBasicRequestor/169

Subscribing client to Solace provide Reply-To topic
Sending request to: T/GettingStarted/request

Received a response!
    Correl. Id: c6edf881-f211-4b3d-815f-87c3aeb95f22
    Message:    Sample Response

Exiting
With the message delivered, the replier output will look like the following:
Received a request message!
    Correl. Id: c6edf881-f211-4b3d-815f-87c3aeb95f22
    Reply To:   _P2P/v:solace-vmr/_mqtt/HelloWorldBasicRequestor/169
    Message:    Sample Request

Sending response to: _P2P/v:solace-vmr/_mqtt/HelloWorldBasicRequestor/169
Exiting
With that you now know how to successfully implement the request-reply message exchange pattern using MQTT.


